357th FG Profile
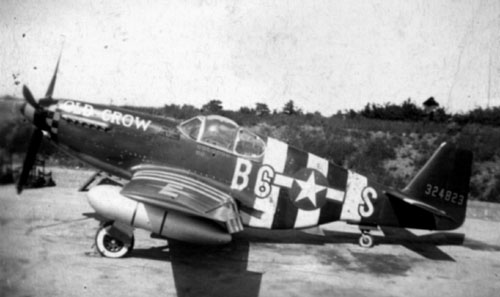
Capt. Clarence E. “Bud” Anderson’s P-51B Mustang “Old Crow”
Summer 1944
Modeler Tips:
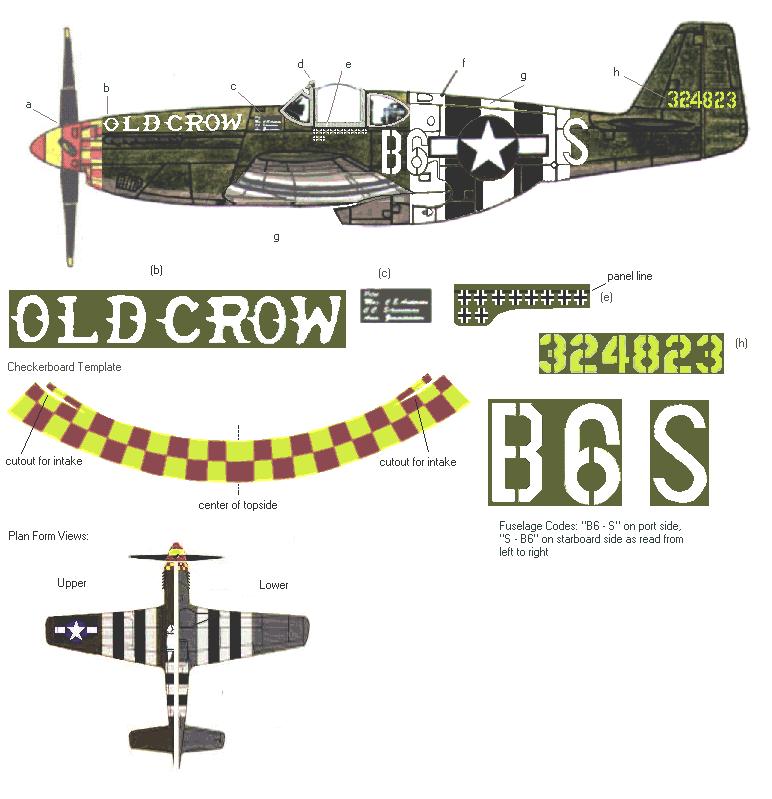
a. Rear red band on propeller boss extends onto spinner to leading edge of blades when in neutral pitch. Determine width of yellow band by dividing remainder of spinner evenly.
b. “Old Crow” lays along upper cowl seam on both sides with the serifs on the port “O” and starboard “W ” barely touching the checkerboard.
c. Name placard for pilot & crew lays along seam with upper right corner against canopy frame without
overlapping it. Name Plate info:
Pilot
Capt C E Anderson
C/C S/Sgt Heino
Arm Sgt Zimmermann
d. Standard ETO round mirror, canopy frame work left natural aluminum.
e. Eight kill markings- black crosses with white borders- six in top row, two in bottom row.
f. 36″ Wire whip antenna.
g. Full suite of invasion stripes, wings and fuselage-fuselage codes outlined in green where they overlap the
first and last stripes.
h. Tail Number- “324” on fin, “823” on rudder.
i. Standard U.S. Star & Bar Insignia
Overall Modeling Tips:
*Tires and tail wheel were painted with whitewalls on sides from hub to tread. Fuselage codes have been problematic for modelers since most decal manufacturers don’t provide an olive green outline for the characters. We’ve found that if you draw an outline for the codes onto the back side of a piece of masking tape and place it exactly where the decal is to be placed it will leave a green area cut into the white invasion stripes. After the decals are affixed, you can use a fine brush to cut-in the spaces inside the codes where the stripes show through.
*Paint on the flat colors first (recognition stripes) – then mask off those features and paint the the remainder of the aircraft in natural aluminum color. Most metal colors will be marred or removed by masking materials.
*Apply Victory Board prior to Pilot & Crew Nameplate- then align the nameplate with windshield, fuselage panel, and victory board as the reference points.
*After building several 357th A/C over the past 30 years, I recommend painting the nose area forward of the exhaust cutout yellow when the flat features are painted. Carefully cut away the yellow squares from the checkerboard decal and apply the remaining strip of red checkers to the nose. This method significantly reduces the potential for bubbles, and wrinkles plus it makes exact alignment of the decal easier.
*Prior to assembly, wash clear plastic parts with a mild glass cleaner and gently wipe dry. Then use a Q-Tip to evenly spread clear liquid floor wax (Future Brand seems to get the best results) on both inside & outside. Protect from dust and let dry for at least 2 hours. The wax fills in microscopic flaws and creates an even gloss that is clearer & shines brighter than the original plastic underneath.
Repli-Scale Decal Sheet 48-5059 and Various Model Kits like the Academy Kit 1667
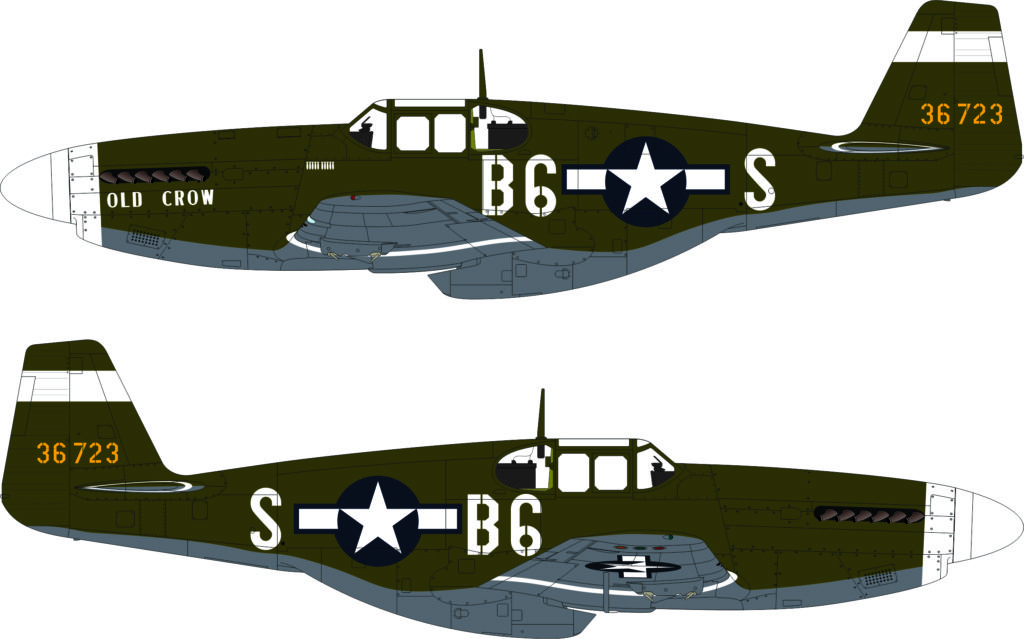
Bud’s first P-51B “Old Crow”
P-51B, 43-6723, B6-S – lost 21 Feb 1944 with Lt Al Boyle
White nose and stripes, early 357th FG markings!
Bullseye Model Aviation Decals – Courtesy of Scott Brown